http://sewmotion.us1.list-manage.com/subscribe?u=283af0689412a27dde38a81a9&id=94559d9e45

Thursday 29 September 2016

Craft is good for the soul


Following on from last week’s post, I thought I would look deeper into why learning something new makes me feel so happy, and why it’s essential to make time in our busy lives to discover something we didn’t know before, or to try something way out of our comfort zone. And I’m not talking about bungee jumping or cave diving here, but something a lot more accessible to us all – craft.

Whether it’s knitting, crochet, dress-making or like me, ‘cutting up fabric to sew it back together again’, creative hobbies give you so much more than just a finished object.


http://www.sewmotion.com/sewmotion_shop/prod_4634796-Monochrome-Sunset-Zig-Zag-Quilt-Kit-in-Riley-Blakes-Dot-Dash-and-Kona-Solids.html

Recent medical research has found that not only do creative activities such as crafts relieve stress, anxiety and even depression, but they can also improve happiness and a sense of wellbeing. The activity of sitting still for a couple of hours and concentrating on just one thing can do wonders for your mental state. Just being able to shut out life’s problems for a little while can bring a great sense of peace and mindfulness which let’s face it, we could all do with a little of these days.


http://www.sewmotion.com/sewmotion_shop/cat_1078135-Cushion-Kits.html

I know the same can be said for doing the daily crossword or Sudoku puzzle, but there seems to be more to actually creating something - be it a handmade quilt, a knitted scarf or a crocheted egg cosy - working with colour and different textures, having to make creative decisions, or even mathematical ones – and then at the end, to have a finished item made by yourself, that sense of accomplishment when you can say proudly “I made that” – can surely only be a good thing, right?!

These kind of crafts that stretch your knowledge are also said to be great for maintaining your brain’s cognitive skills, after all, your brain is a muscle that needs to be used constantly to keep it in good condition. We have got to keep learning and pushing our boundaries, our comfort zones, after all, isn’t that is what life’s about? For living? What a waste it would be to just stop – no new experiences, no great accomplishments, no understanding of new ideas. Crafts can give you all of this, and so much more, I haven’t even touched on the community and sense of inclusion that these activities can evoke.


http://www.sewmotion.com/beginners_quilt.html

With so many online resources at our fingertips these days, it's so easy to have a taster of a new hobby before devling into a local class or workshop. YouTube is a great place to start – if you would like to learn more about quilting I strongly recommend the Missouri Star Quilt Company and the Fat Quarter Shop for some great free tutorials.
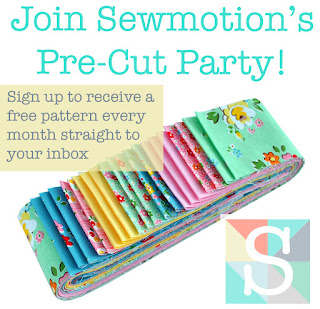
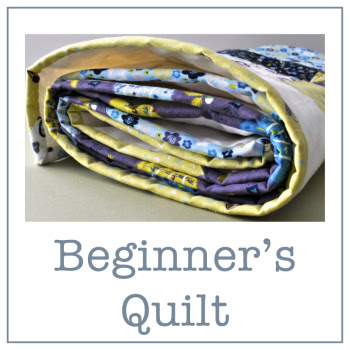
And of course, you could always start with my Quick & Easy/Beginner’s Quilt tutorial and pre-cut Kits. For more about the basics of quilting, from the equipment you need, to which fabric and waddings to use, check out my free tutorials.

And if you're already quilting/knitting/crocheting, here's to a long, creative and very happy life... but don't forget, there's always something new to learn just around the corner.

This week I'm linking up with these great parties:
Let's Bee Social at Sew Fresh Quilts
Midweek Makers at Quilt Fabrication
Needle & Thread Thursday at My Quilt Infatuation


http://sewmotion.us1.list-manage.com/subscribe?u=283af0689412a27dde38a81a9&id=94559d9e45


Friday 23 September 2016

Folksy Friday: Mid-Century Modern

Life is a little stressful over here at the moment, but also really exciting... we're moving house.. again! I know it's going to be exhausting and a lot of work, though it is nice to be moving to a house in the same town for a change.What I'm really excited about is decorating, particularly my studio!! Ikea, here we come! As for the rest of the house, we've recently both realised that we love the Mid-Century Modern style that seems to be everywhere at the moment, so I decided to do a little research into what Folksy sellers have to offer. Enjoy!  


1. Tea Towel in Flowerpress Design, Annabl Perrin, £12
2. Brutalist London Balfrom Tower, Eye For London Prints, £18  
3. Robin and Tree Necklace, Claire Gent, £64.95 
4. Jam Cross Range Reclaimed Oak Side Table, JAM Furniture, £415
5. Bird Print, Cassia Beck Collage, £12
6. Atomic Handmade Lampshade, Rubydo Designs, £32.95
7.  Waterproof Wallet, Jiggle Ma Wiggle, £9
8.  G-Plan Chair, ReCover, £105
9. Ting Coffee Table, La Maison De Furniture, £190

These beautiful items have been designed and created by some of the very talented sellers on Folksy - the online marketplace for modern British craft - go and explore their shops - you may get that September feeling too!

www.folksy.com
   

Thursday 22 September 2016

Never Stop Learning


I am a great believer in the adage that you should never stop learning. Not only do new experiences keep your brain working, but it also helps build confidence and provides a great feeling of wellbeing, which can only make you happy, right!?

So having spent far too much time lately staring at the Mac screen or cutting up fabric for kits, I decided to take a whole day to myself to learn something new. I actually ended up trying a couple of new things – foundation piecing using freezer paper, and sewing curves!


http://www.todaysquilter.com/
Inspired by Jo Avery’s New York Beauty pattern in last month’s Today’s Quilter, I thought it was time to try these curves I’ve been seeing all over Instagram. I then remembered that one of the classes I have on Craftsy was Playing with Curves with Ann Petersen - a class by a very talented lady who takes you through everything slowly and methodically – highly recommended. 

http://www.craftsy.com/class/playing-with-curves/382?_ct=sbqii-sqjuweho-dum&_ctp=2&rceId=1474453511386~phowirpb

Anyway, I thought I’d just refresh my memory on foundation piecing, and found that Ann's method uses freezer paper and that she doesn’t actually sew through the paper at all… this I had to see!

 
I got stuck in and soon found my rhythm, so much so that I forgot to take any photos of my process! Next time… I think I do prefer this method and it was a joy to just peel back the papers at the end rather than all that ripping. I will do a tutorial on this method for a future project, but for now, why not pop over to Craftsy and have a browse through their classes, they really are worth every penny!


Back to the block... so once the pieced arcs were complete, next came the curves, and they weren’t actually as bad as I thought… I have made some Drunkards Path blocks before, and these were just the same. A few pins and a very slow pace at the machine, and they came out ok. Phew!

 
Unfortunately I only have fat quarters of these bluey greens, my mum who claims she doesn’t do colour’ bought them for me, and I think she did pretty well! So I think this may be a cushion, and I will try my hardest to not lose it in a box and to actually get it quilted!

So do you feel inspired to learn something new? Why not have a look through my free tutorials and see if something catches your eye? 

Even better, you could subscribe to my Newsletter to recieve a free pattern based on pre-cuts, every month straight to your inbox? Click below to subscribe.
http://sewmotion.us1.list-manage.com/subscribe?u=283af0689412a27dde38a81a9&id=94559d9e45

For even more inspiration, pop along and visit these great Linky parties;
Let's Bee Social at Sew Fresh Quilts
Midweek Makers at Quilt Fabrication
Needle & Thread Thursday at My Quilt Infatuation 
Building Blocks Tuesday at Quilter In The Closet 

Thursday 15 September 2016

Zig Zag Pattern Release and a Sneaky Peek

When I was setting up my stand at the Harrogate quilt show, I knew I had to have my most striking quilt on display to catch the eye, and sure enough my Monochrome Sunset quilt did just that. Not only did I sell out of the kits, (now back in stock) but many people asked if I had it as just the pattern - which I now do!

http://www.sewmotion.com/sewmotion_shop/prod_5309383-Monochrome-Sunset-Quilt-Pattern.html

I called this kit Monochrome Sunset because of the black and white fabrics, with a splash of yellow and orange used in the quilt. However, I do think this zig zag design would look beautiful in so many colourways, rainbows for instance - I do love a rainbow! This quilt only takes 18 patterned strips to make, plus a light solid/blender that makes up the rest, so you could use any of my 20pc strip sets here, or half a traditional jelly roll that's been sitting on the shelf for ages. 


http://www.sewmotion.com/sewmotion_shop/cat_1244095-Strippers.html

You can purchase the paper pattern here, (£6.95) with free UK postage, or if you prefer digital downloads, you can get a PDF from my Etsy shop here (£6.60).

For the rest of this week, I've been in sewing heaven, it seems likes ages since I've sat at my machine and enjoyed some quilting - and I've actually finished something too! Here is a sneaky peak at next month's Pre-Cut Party pattern, this time based on charm squares. 


If you would like to receive a free pattern straight to your inbox every month, why not subscribe to my Newsletter. Not only will you be inspired to get cutting into those treasured pre-cuts, but you'll also hear about my latest products and events, as well as subscriber-only offers. Click below to sign-up.

http://sewmotion.us1.list-manage.com/subscribe?u=283af0689412a27dde38a81a9&id=94559d9e45


For more quilting fun and inspiration, pop along to these linky parties and sat Hi.
Let's Bee Social at Sew Fresh Quilts
Needle & Thread Thursday at My Quilt Infatuation
Finished or Not Friday at Busy Hands Quilts

Friday 9 September 2016

Folksy Friday - Let's Get Crafty!

September always makes me feel more creative than usual, with a yearning to learn something new...  I guess this has something to do with that 'going back to school' feeling. So I thought this week I'd delve into the craft kits available on Folksy. 

Kits are a great introduction to a new craft - the colours/designs are chosen for you, you don't have to buy large quantities of supplies to see if you like it, you can just get stuck in! My own kits are great for Beginners wanting to learn how to quilt. Alternatively, kits are also great for more experienced crafters looking for a ready-to-go project, maybe to take on a journey or for over a weekend - hopefully these will inspire you to try something new!


1. Rag Doll Craft Kit, Podflower, £29.99
2. Waves Embroidery Kit, Oh Sew Bootiful, £16.50
3. Mole Needle Felt Kit, The Makerss, £26
4. Quick & Easy Quilt Kit, Sewmotion, £30
5. Hand Embroidery Hoop Kit, Pixiecraft, £23
6. Knitting Kit for Valentine Cushions, The Feminine Touch Designs, £10
7. Make Your Own Perfume Kit, Make with Mum, £14
8. Log Cabin Cushion Kit, Beyond Fabrics, £29.99
9. Milo the Monkey Felt Sewing Kit, Fox and Bee Crafts, £14.99

These inspiring kits have been designed and created by some of the very talented sellers on Folksy - the online marketplace for modern British craft - go and explore their shops - you may get that September feeling too!

www.folksy.com
 

Thursday 8 September 2016

All Squared Up Quilt - Pieced Backing Instructions

One of my most popular sales last weekend at the Great Northern Quilt Show was my All Squared Up Quilt Kit in Japanese prints, so much so I've had to reorder some of the fabrics! It was also great to see people as interested in my pieced backing as they were in the front. So I thought this week I would include instructions for the backing - if you are one of the lovely people who bought this kit from me, and would like to purchase the fabrics for the back, contact me here and I'll send you the details.


Whenever I have a quilt around 60" wide, rather than joining two widths of the same fabric for the backing, I tend to use just one length with a pieced panel to make up the extra in width. So in this quilt I echoed the block used in the front, just on a larger scale - these squares are 6½”.


You will need:
• 60” x WOF (width of fabric) of main backing fabric (I have used the Red Geometric print).
• Three fat quarters in co-ordinating prints (I used a fat quarter of the Cream Geometric print, the Red Flower and the Cream Owls).

• One fat quarter of the solid you used on the front – in my case Cream.

Cutting instructions:


1) The cutting and construction of these three blocks is exactly the same as those on the front of the quilt, just with larger dimensions. So from each of the patterned fat quarters, cut the following:

* two 6½” x 18½” rectangles   

* two 6½” squares

Then from the Solid (cream) fat quarter, cut:

* three 6½” squares

* two 18½” x 3½” strips 


Piecing instructions:


2) For each block, sew the centre three squares together, with a cream one in the middle. Press seams towards the patterned fabric.

3) Sew a rectangle to either side of your centre strip to complete the block – again press seams towards the patterned fabric.

4) Sew these three blocks into one long panel, then add a solid (cream) 18½” x 3½” strip to the top and bottom.


5) Lay out your 60” of main fabric onto your cutting table, and trim off the selvedge with your ruler. Unfold the fabric so you’re only cutting through one layer, and use you quilter’s ruler to measure and cut off a 15” strip DOWN THE LENGTH of the fabric (not across the width). This will give you two panels to sew onto either side of your pieced blocks. Press seams toward the main fabric.


6) You are now ready to baste your quilt sandwich. To ensure your backing is straight and lined up with the front, fold your backing in half and place a pin at the centre mark of the top and bottom edges. Unfold, and fold again the other way, placing a pin at the centre mark of these two side edges.  Do the same with your quilt top.

7) Now find somewhere clean and flat, lay out your backing fabric, face down, and tape to the surface to keep flat. Lay and smooth out your wadding on top of this, and then finally place the quilt on top, face up, lining up those pins along each edge of the top and backing. Baste with curved safety pins and quilt.

A note on quilting: You could simply sew some stitch-in-the-ditch down and across each of your main seams. Or, if you’re feeling adventurous you could try some free-motion quilting over the entire top.

I chose to use my walking foot and stitch wavy lines across the top. To do this, start at the middle of one edge of the quilt and roughly following the centre seam, sew a gentle wavy line down the middle of the quilt. When you get to the opposite edge, break thread and pull the quilt back through the machine to start the next line to the right of first one.
Carry on working in this direction so you only ever have half the quilt rolled up under the machine. Try not to echo the previous line to avoid it looking too uniform, instead mirror the pattern in places, or go wide and come back and fill in later. If you go a little too wild, you will have the next line of blocks’ seams to guide you back to a ‘straighter’ wave.

I do love this style of quilting - it looks so fresh and modern!! For this kit and more, plus plenty of pre-cuts to inspire you for your next project, visit my shop at sewmotion.com

For more inspiration why not subscribe to my Newsletter for a free pattern every month, plus subscriber only offers and updates on my latest products and events.


Check out these Linky Parties for more fun and quilty goodness;

Let's Bee Social at Sew Fresh Quilts
Needle & Thread Thursday at My Quilt Infatuation
Midweek Makers at Quilt Fabrication