


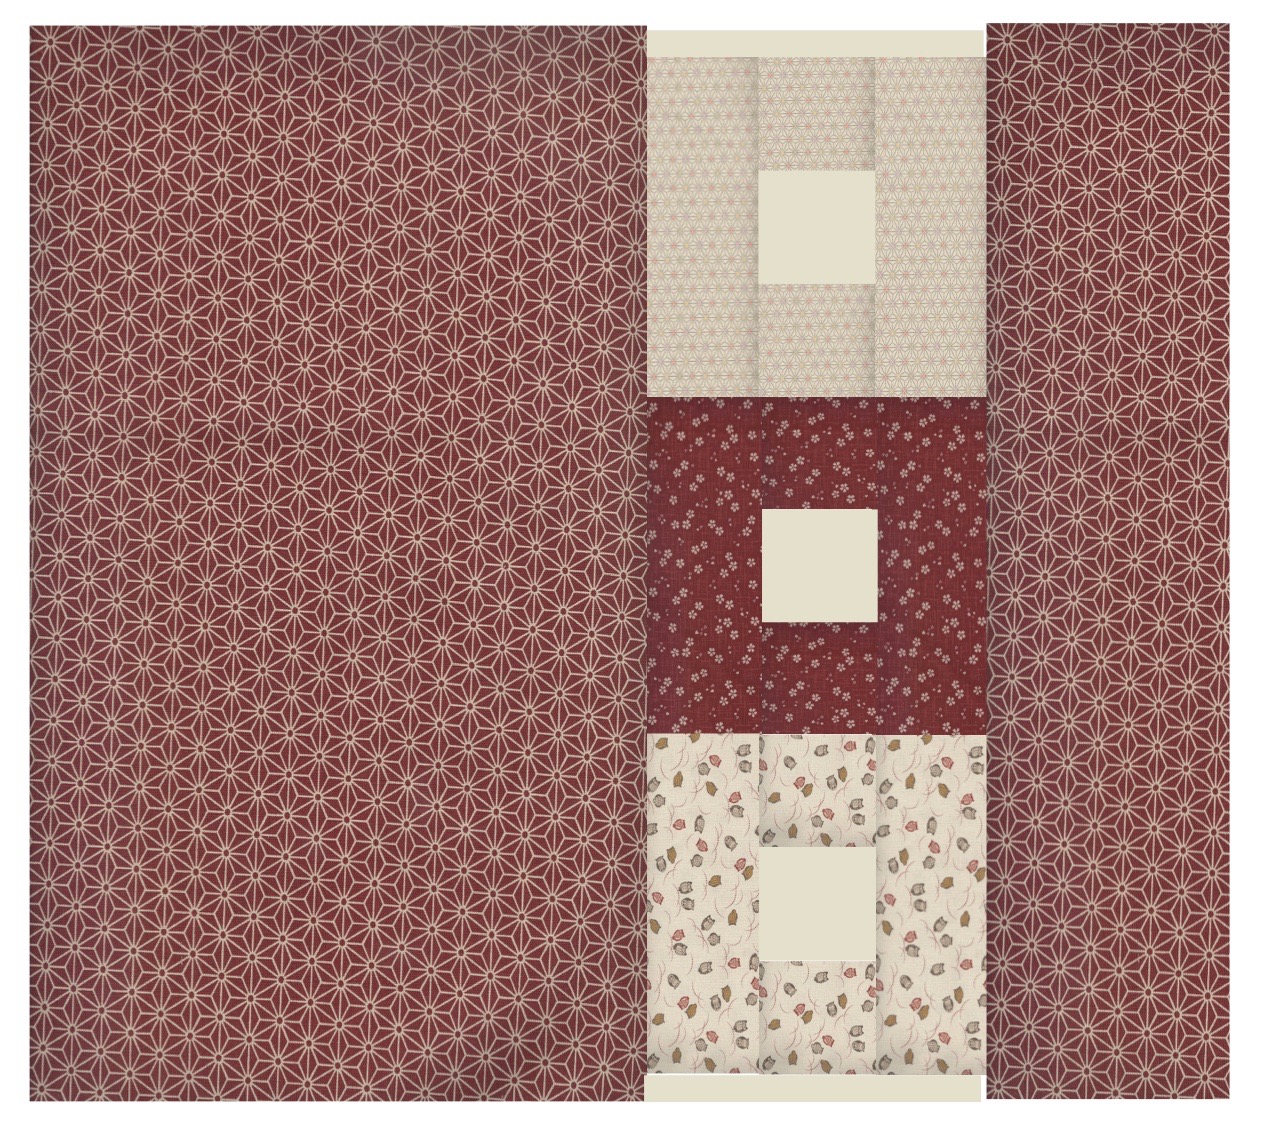
Whenever I have a quilt around 60" wide, rather than joining two widths of the same fabric for the backing, I tend to use just one length with a pieced panel to make up the extra in width. So in this quilt I echoed the block used in the front, just on a larger scale - these squares are 6½”.
• 60” x WOF (width of fabric) of main backing fabric (I have used the Red Geometric print).
• Three fat quarters in co-ordinating prints (I used a fat quarter of the Cream Geometric print, the Red Flower and the Cream Owls).
• One fat
quarter of the solid you used on the front – in my case Cream.
Cutting instructions:
1) The cutting
and construction of these three blocks is exactly the same as those on the
front of the quilt, just with larger dimensions. So from each of the patterned
fat quarters, cut the following:
* two 6½” x
18½” rectangles
* two 6½”
squares
Then from the Solid (cream) fat quarter, cut:
Then from the Solid (cream) fat quarter, cut:
* three 6½”
squares
* two 18½” x
3½” strips
Piecing instructions:
2) For each
block, sew the centre three squares together, with a cream one in the middle.
Press seams towards the patterned fabric.
3) Sew a rectangle to either side of your centre strip to complete the block – again press seams towards the patterned fabric.
4) Sew these three blocks into one long panel, then add a solid (cream) 18½” x 3½” strip to the top and bottom.
3) Sew a rectangle to either side of your centre strip to complete the block – again press seams towards the patterned fabric.
4) Sew these three blocks into one long panel, then add a solid (cream) 18½” x 3½” strip to the top and bottom.

5) Lay out your 60” of main fabric onto your cutting table, and trim off the selvedge with your ruler. Unfold the fabric so you’re only cutting through one layer, and use you quilter’s ruler to measure and cut off a 15” strip DOWN THE LENGTH of the fabric (not across the width). This will give you two panels to sew onto either side of your pieced blocks. Press seams toward the main fabric.

6) You are now
ready to baste your quilt sandwich. To ensure your backing is straight and
lined up with the front, fold your backing in half and place a pin at the
centre mark of the top and bottom edges. Unfold, and fold again the other way,
placing a pin at the centre mark of these two side edges. Do the same with your quilt top.
7) Now find somewhere clean and flat, lay out your backing fabric, face down, and tape to the surface to keep flat. Lay and smooth out your wadding on top of this, and then finally place the quilt on top, face up, lining up those pins along each edge of the top and backing. Baste with curved safety pins and quilt.
A note on quilting: You could simply sew some stitch-in-the-ditch down and across each of your main seams. Or, if you’re feeling adventurous you could try some free-motion quilting over the entire top.
I chose to use my walking foot and stitch wavy lines across the top. To do this, start at the middle of one edge of the quilt and roughly following the centre seam, sew a gentle wavy line down the middle of the quilt. When you get to the opposite edge, break thread and pull the quilt back through the machine to start the next line to the right of first one.
Carry on working in this direction so you only ever have half the quilt rolled up under the machine. Try not to echo the previous line to avoid it looking too uniform, instead mirror the pattern in places, or go wide and come back and fill in later. If you go a little too wild, you will have the next line of blocks’ seams to guide you back to a ‘straighter’ wave.
I do love this style of quilting - it looks so fresh and modern!! For this kit and more, plus plenty of pre-cuts to inspire you for your next project, visit my shop at sewmotion.com
For more inspiration why not subscribe to my Newsletter for a free pattern every month, plus subscriber only offers and updates on my latest products and events.

Check out these Linky Parties for more fun and quilty goodness;
Let's Bee Social at Sew Fresh Quilts
Needle & Thread Thursday at My Quilt Infatuation
Midweek Makers at Quilt Fabrication
I've always liked backs that look like they could double as a "front". Beautifully done.
ReplyDeleteThank you, so do I! 😀
DeleteI bought one of the All Squared Up Quilt kits, I have completed the top, just need to add the sashing and finish it off. I love it, the colours are gorgeous. Would like to make the zigzag quilt next but you can't see the pattern in the shop. any chance it will be available soon? Andrea
ReplyDeleteWow!! That was quick, well done!! I'm in the process of making up the pattern this week, I'll let you know when it's available, x
DeleteHello again Andrea, My zig zag quilt (Monochrome Sunset) pattern is now available in my online shop at Sewmotion.com, or if you would like a PDF for instant download, that's in my Etsy shop at SewmotionUK.etsy.com
DeleteThis is so pretty! Nice project ♥
ReplyDeletesummerdaisycottage.blogspot.com
Thank you so much :)
DeleteI'm very apt to do that same technique with the back of my quilts, Louisa. In fact, one of my favorites I kept has the repeat of the front blocks on the back for the extra width and I enjoy seeing that side of the quilt as much as the front! Lovely design, great tutorial.
ReplyDeleteI love echoing blocks on the back, and depending on what fabrics you have left over, it can also work out cheaper sometimes than get extra wdith or two whole lengths! Thanks for your comments and for stopping by, :)
DeleteGreat quilt, and great back - thanks for sharing the tutorial on Midweek Makers!
ReplyDeleteThank you, and for hosting a great linky! :)
Delete